-
 Thanh toán đa dạng, linh hoạtChuyển khoản ngân hàng, thanh toán tại nhà...
 -
 Miễn Phí vận chuyển 53 tỉnh thànhMiễn phí vận chuyển đối với đơn hàng trên 1 triệu
 -
 Yên Tâm mua sắmHoàn tiền trong vòng 7 ngày...
Plant Lady Embroidery: 300 Botanical Embroidery Motifs & Designs to Stitch
-

- Mã sản phẩm: 1631598457
- (499 nhận xét)


- Publisher:Quarry Books (April 28, 2020)
- Language:English
- Paperback:120 pages
- ISBN-10:1631598457
- ISBN-13:978-1631598456
- Item Weight:1 pounds
- Dimensions:8.35 x 0.55 x 10.3 inches
- Best Sellers Rank:#65,822 in Books (See Top 100 in Books) #110 in Embroidery Kits #1,731 in Crafts & Hobbies (Books)
- Customer Reviews:4.7 out of 5 stars 499Reviews
Mô tả sản phẩm
From the Publisher

Plant Lady Embroidery: 300 Botanical Embroidery Motifs & Designs to Stitch
How to Use This Book
Each motif in this book comes with a stitch guide, which includes all the information you’ll need to stitch up the design, as well as a full-size template that can be traced easily. At the top of each page, you’ll also find some general information that applies to all the motifs included on that page. The following guide explains how to read the embroidery diagrams.
A. Motif Number: Use the motif number to locate your design. These numbers are also included on the photos of the stitched motifs at the beginning of the book.
B. Stitch Name: These labels indicate which stitch to use for each element of the design. Note: The word “stitch” is omitted from these labels in order to save space. Refer to the Embroidery Stitch Guide on pages 48–53 for instructions on making each of the 15 basic stitches used in this book.
C. Number of Strands: The circled numbers (for example: ②) indicate how many strands of embroidery floss to use when making a stitch.
D. Color Number: These numbers indicate the required floss color. Olympus brand floss was used to stitch the designs in this book. A conversion chart for DMC brand is included on page 55.
Stitch Guides for:
- Orchids & Chrysanthemums
- Spring, Summer, Autumn, and Winter Flowers
- Flower Branches
- Fruit Trees
- Herbs
- Wildflowers & Mushrooms
- Cacti & Succulents
- Tropical Plants

Herbs
Instructions: Pages 92–95
Design & Embroidery: Yasuko Shibata

Wildflowers & Mushrooms
Instructions: Pages 96–99
Design & Embroidery: Yasuko Sebata

Foliage Plants
Instructions: Pages 108–111
Design & Embroidery: Horiuchi Sayuri
Project Inspiration Gallery: Try embroidering a pretty flower or some gorgeous greenery onto everyday items for a special touch. These colorful blooms are sure to brighten your day!

Brooches
Stitch an elegant rose motif onto felt, then attach a pin to the back to create a wearable work of art.
Motifs 3 and 8 on page 56

Blouse
Embellish a linen blouse with a small floral motif.
Motif 189 on page 94

Sampler
This spring flower sampler will brighten up any room.
Motifs 56–62 on page 68

Oven Mitt
Add a few fruit-themed motifs to customize your kitchen gear.
Motifs 238 and 239 on page 104
Embroidery Stitch Guide: All of the designs in this book were made with 15 basic embroidery stitches. The following guide illustrates how to make each stitch.

FRENCH KNOT
A. Draw the needle out at 1. Wrap the thread around the needle tip twice.
B. Insert the needle back through the fabric at 2, just next to 1. Hold the wraps against the fabric as you pull the needle and thread through the fabric to complete the knot.
C. For smaller French knots, wrap the thread around the needle only once.

LAZY DAISY STITCH
A. Draw the needle out at 1. Wrap the floss around the needle tip. Insert the needle at 2 (this is actually the same hole as 1), then draw the needle out again at 3.
B. This is the same process used to make a chain stitch as shown on page 49.
C. Pull the needle and floss through the fabric until a small loop remains. Insert the needle at 4, making a tiny straight stitch to secure the loop.

SATIN STITCH
A. Draw the needle out at 1, insert it at 2, then draw the needle out again at 3.
B. Continue stitching from outline to outline to fill the area.


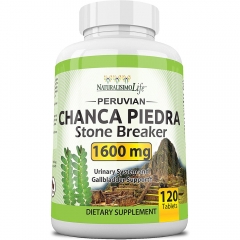
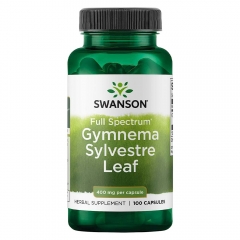


 KHUYẾN MÃI LỚN
 Đông Trùng Hạ Thảo
 Hỗ Trợ Xương Khớp
 Bổ Não & Tăng cường Trí Nhớ
 Bổ Sung Collagen & Làm Đẹp
 Bổ Thận, Mát Gan & Giải Độc
 Chăm Sóc Sức khỏe Nam Giới
 Chăm Sóc Sức khỏe Nữ Giới
 Chăm sóc Sức khỏe Trẻ Em
 Thực Phẩm Giảm Cân, Ăn Kiêng
 Bổ Sung Vitamin & Khoáng Chất
 Bổ Tim Mạch, Huyết Áp & Mỡ Máu
 Bổ Mắt & Tăng cường Thị lực
 Điều Trị Tai Mũi Họng
 Sức Khỏe Hệ Tiêu hóa
 Chăm Sóc Răng Miệng
 Chống Oxy Hóa & Tảo Biển.